TensorFlow & PyTorch with CUDA: Anaconda & Jupyter Lab Setup
Table of content
Block
Overview
This quickie provides a step-by-step walkthrough of setting up TensorFlow and PyTorch with CUDA support for Nvidia GPUs on Windows 10, using Anaconda and Jupyter Lab. We’ll create separate conda environments for TensorFlow and PyTorch, ensuring isolated workspaces for each project. This allows you to manage dependencies effectively and avoid conflicts. Furthermore, we’ll configure Jupyter Lab to recognize these environments as selectable kernels, enabling you to seamlessly switch between TensorFlow and PyTorch projects within the Jupyter Lab interface while leveraging GPU acceleration for your deep learning tasks.

Notice: This post assumes a fresh system with no prior installation of related programs and tools. If you have already installed some or all of these (CUDA, drivers, Anaconda, Python, etc.), it is strongly recommended to cleanly remove them before proceeding with this guide. A fresh install minimizes potential conflicts and ensures a smooth setup process.
Anaconda
Anaconda is a popular open-source distribution of Python and R, designed to simplify package management and deployment for scientific computing, data science, and machine learning projects. It includes the Conda package manager and a collection of over 300 pre-installed packages, along with Anaconda Navigator, a graphical user interface for managing environments and packages. You may also look into Miniconda if you don’t need the pre-installed packages for a more lightweight installation.
Download the Installer:
Go to anaconda.com and download the latest Windows installer.
Run the Installer:
- Locate the downloaded
.exefile and double-click to run it. - Follow the on-screen instructions:
- Click “Next” on the welcome screen.
- Read and accept the license agreement.
- Choose whether to install for “Just Me” or “All Users”. (“Just Me” is recommended)
- Select the installation location.
- On the “Advanced Installation Options” screen, it’s recommended to check the box labeled “Add Anaconda to my PATH environment variable” to enable using Anaconda from the standard Command Prompt.
- Click “Install” to begin the installation process.
Launch Anaconda Prompt
- After installation, open the Start Menu and search for “Anaconda Prompt.”
- Click to open it; this specialized command prompt is configured to use Anaconda and Conda commands.
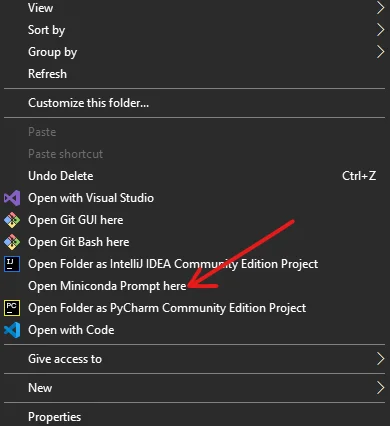
Optional: Add to Context Menu
For ease of access in File Explorer, I recommend adding Anaconda to the context menu—this way you can always access the CLI interface anywhere:
- Run Registry Editor (regedit.exe).
- Go to
HKEY_CLASSES_ROOT > Directory > Background > shell. - Add a key named
AnacondaPromptand set its value toAnaconda Prompt Here. - Add a key under this key called
command, and set its value tocmd.exe /K C:\Users\user\Anaconda3\Scripts\activate.batchange the location to wherever your Anaconda installation is located.
(Credit: Stack Overflow)
Create Tensorflow environment
Below is a step‐by‐step guide to build an isolated Conda environment that is fully compatible for TensorFlow with GPU support, integrated into JupyterLab as a selectable kernel. Before you begin, make sure that your system meets the following prerequisites:
- An NVIDIA GPU with up-to-date drivers installed.
- The appropriate CUDA and cuDNN support for your desired TensorFlow version (you can check the official TensorFlow GPU guide for version compatibility).
In this example, we’ll use Python 3.8 with TensorFlow 2.4.1, CUDA Toolkit 11.0, and cuDNN 8.0—versions that have been known to work together reliably.
Step 1. Create a New Conda Environment
Open the Anaconda Prompt, ensure that you are in the base environment, this mean your CLI should look something like this: (base) C:\Users\PC>_.
Create a fresh environment (here named “tf_gpu_env”) using Python 3.8:
conda create -n tf_gpu_env python=3.8
Step 2. Activate the Environment
Activate your new environment:
conda activate tf_gpu_env
The process should look something like this:
(base) C:\Users\PC>conda activate tf_gpu_env
(tf_gpu_env) C:\Users\PC>_
Step 3. Install CUDA Toolkit and cuDNN
Install the CUDA Toolkit and cuDNN libraries from conda-forge. (These packages bundle the runtime libraries that TensorFlow needs. Note that your system must still have the proper NVIDIA drivers installed.)
conda install -c conda-forge cudatoolkit=11.0 cudnn=8.0
Step 4. Install TensorFlow with GPU Support
Install TensorFlow using pip.
pip install tensorflow-gpu==2.4.1
Step 5. Install JupyterLab and ipykernel
Next, install JupyterLab in the environment so that you keep all dependencies isolated. Then install ipykernel via pip (this avoids potential downgrades of TensorFlow that sometimes occur when using Conda’s ipykernel package).
conda install jupyterlab
pip install ipykernel
Step 6. Register the Environment’s Kernel with JupyterLab
Register your new environment as a Jupyter kernel. This makes it selectable when you open a notebook in JupyterLab.
python -m ipykernel install --user --name tf_gpu_env --display-name "TensorFlow GPU"
Step 7. Launch JupyterLab and Test GPU Availability
Start JupyterLab from within your activated environment:
jupyter lab
Create a new notebook selecting the “TensorFlow GPU” kernel. Then, run the following code to verify that TensorFlow detects your GPU:
import tensorflow as tf
print("GPUs available:", tf.config.list_physical_devices('GPU'))
A quick script to test out tensor operation:
import tensorflow as tf
import time

# Log the device being used
physical_devices = tf.config.list_physical_devices('GPU')
print("Available GPU devices:", physical_devices)

# Create a large tensor operation
A = tf.random.normal([1000, 1000])
B = tf.random.normal([1000, 1000])

# Warm-up run to ensure accurate benchmarking
_ = tf.matmul(A, B)

# Time the matrix multiplication operation
start_time = time.time()
result = tf.matmul(A, B)
end_time = time.time()

print(f"Operation completed in {end_time - start_time:.6f} seconds")
Create PyTorch environment
You can also create a relatively similar environment with PyTorch:
Step 1. Create a New Conda Environment
conda create -n pt_gpu_env python=3.8
Step 2. Activate the Environment
conda activate pt_gpu_env
Step 3. Install PyTorch with GPU Support
conda install pytorch torchvision torchaudio pytorch-cuda=11.8 -c pytorch -c nvidia
Step 4. Install JupyterLab and ipykernel
conda install jupyterlab
pip install ipykernel
Step 5. Register the Environment’s Kernel with JupyterLab
python -m ipykernel install --user --name pt_gpu_env --display-name "PyTorch GPU"
Step 6. Launch JupyterLab and Test GPU Availability
jupyter lab
import torch

print("Is CUDA available?", torch.cuda.is_available())
print("Number of GPUs:", torch.cuda.device_count())

if torch.cuda.is_available():
    current_device = torch.cuda.current_device()
    print("Current GPU device index:", current_device)
    print("GPU name:", torch.cuda.get_device_name(current_device))
import torch
import time

# Create two random tensors
A = torch.randn(10000, 10000, device='cuda')
B = torch.randn(10000, 10000, device='cuda')

# Warm-up to avoid initialization overhead
_ = torch.matmul(A, B)

# Benchmark the matrix multiplication
start_time = time.time()
result = torch.matmul(A, B)
end_time = time.time()

print(f"Matrix multiplication completed in {end_time - start_time:.4f} seconds")
Global Python Installations and Jupyter Lab
I know some people have a globally installed Python setup for various utilities, and that’s completely fine. However, it’s crucial to never mix packages from your global Python environment with your isolated Conda environments. This can lead to dependency conflicts, version mismatches, and unexpected behavior in your deep learning workflows.
One valid approach is to install Jupyter Lab globally instead of within each environment. This way, you only need to add each Conda environment as a kernel instead of maintaining separate Jupyter Lab installations across multiple environments. To do this:
- Install Jupyter Lab in your global Python or base Conda environment:
conda install -n base jupyterlab
- Ensure each environment is registered as a kernel:
python -m ipykernel install --user --name your_env_name --display-name "Your Env Display Name"
- Launch Jupyter Lab globally and switch between environments via the kernel selector.
Notice: If you open a terminal inside the globally installed Jupyter Lab, it behaves like a standard Command Prompt (cmd) or system shell, not the Anaconda Prompt. This means that commands like conda install or pip install will NOT execute within your active Conda environment by default. If you need to install a package, it’s better to run !pip install package or !conda install package -y directly inside a Jupyter notebook cell to ensure it installs in the correct environment.
Final Considerations
Extreme caution is necessary when adding new packages to CUDA-enabled Conda environments (tf_gpu_env and torch_gpu_env). Here’s why and how to handle it safely:
Why You Need to Be Careful
- Version Compatibility:
- TensorFlow and PyTorch have strict dependencies on CUDA, cuDNN, and specific package versions (like
numpy,scipy, etc.). - A mismatched update could break GPU acceleration or even make the environment unusable.
- TensorFlow and PyTorch have strict dependencies on CUDA, cuDNN, and specific package versions (like
- Conda vs. Pip Issues:
- Mixing
pipandcondainstalls can cause dependency conflicts. - Conda manages binary compatibility, while Pip doesn’t always resolve dependencies correctly.
- Mixing
- CUDA Toolkit Issues:
- TensorFlow and PyTorch come with specific CUDA versions baked in (
pipinstalls prebuilt wheels with the right CUDA). - Installing a different CUDA version separately might break GPU support.
- TensorFlow and PyTorch come with specific CUDA versions baked in (
Best Practices for Installing New Packages
- Always Check Compatibility First.
- Prefer Conda Over Pip.
- Use the Correct Environment.
- Test GPU After Installation.
- Keep a Backup Before Major Changes.
What NOT to Do
- Don’t update packages blindly (e.g.,
conda update --all). - Don’t install CUDA separately unless necessary.
- Don’t mix TensorFlow and PyTorch in the same environment (they have different CUDA dependencies).